It’s apple time! I LOVE this time of year. All the apples are ripe in the orchards and on sale in the stores. The grocery stores here have case lot sales and we take full advantage of them. I have seen a lot of people asking for ideas about what to do after they make apple sauce and apple butter but still find themselves with plenty of apples left. What to do with all those apples? There are so many options for preserving them other than canning, you might just go get more after reading this!
Here I will cover a lot the different things you can do with the surplus of apples you may have. When possible, I will include articles or recipes for the items suggested. This is a great way to learn about canning and can help you go from a newbie to a confident canner!
Almost all of the canning stuff you do with apples is particularly easy, largely due to the high acid content naturally found in them though in some cases you need to add lemon juice or some citric acid to up the levels. Since they are high acid, all you need is to water bath can them up for 10-30 minutes (depending on what you are making), let cool and they will seal nicely. Now you have shelf stable sweet treats ready and waiting for you all winter long, and you don’t need to refrigerate it!
You want to core, peel, and slice or cube the apples before you start processing them. You can do it all by hand but let me tell you from experience: having a peeler/corer/slicer saves you incredible amounts of time and frustration. With my peeler/corer/slicer , I can prepare an entire 40# box of apples in about 20-30 minutes, no joke! It also makes it easier to gather and use those leftovers to make apple cider vinegar (see below)!
The Apples
Applesauce. The classic tasty treat. The basic premise of making applesauce is to core, peel, and cube the apples that are then cooked down in a large stock pot with or without sugar. Some people will add cinnamon and I have personally experimented with adding allspice (use very little if you go with allspice. It is good but easy to overdo). Cook the apples down until they mush up. If you want to have smooth (zero chunks) sauce, using a food processor will help ensure the texture and make things go along faster. Here is an article from a site that is one of my personal favorites on simple applesauce and water bath canning it up.
Apple Butter. In a lot of ways, apple butter is applesauce’s refined cousin. Some people consider apple butter to be an ‘apple jam’ and for the most part, they would be right! The process is pretty much the same (but cooked longer) and a lot of people will use a crockpot for making apple butter. You want to cook them for a longer time on lower heat. The apples cook down much more than when making applesauce and turns a darker color. With the addition of cloves, cinnamon, and sugar, this is a truly great way to get the taste of summer in the middle of winter when you spread apple butter on warm homemade biscuits! Here is a link on how to make apple butter using a crockpot.
Apple Juice. Making apple juice is a good way to work through a large pile of apples. Simply cut them up, put them into a pot (including the peels, minus the core) and bring the heat up. Once the apple chunks are mushy and you have a mash, strain the mash through cheesecloth to get the juice out. You will also have peels in there; don’t toss the peels or mash! The mash can be made into a thicker applesauce and the peels can be used along with the cores to make apple jelly. This article will walk you through making yourself some fresh apple juice. See below for more information on making apple jelly.
Apple Cider. Apple cider is a delicious warm drink on those colder days. The difference between apple cider and apple juice is simple: heat! Apple cider is not filtered or cooked. It is made from fresh apples with the juices extracted out. Using a fruit press is the easiest way to get the juice out but unless you are into pressing a lot of fruit on a consistent basis (such as for making wine), most people are not willing to spend the money to get one.

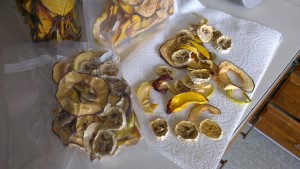
Dehydrated Slices and Cubes. Even if you don’t have a dehydrator, you can still dry and store slices or cubes of apples to be used later on in your oven. If you do have a dehydrator, you can get it filled up with slices that will process while you are making something else (thus being more productive!). We have also cubed apples before dehydrating and let me tell you, they taste A-MAZ-ING when you toss some into your oatmeal in the morning or into your granola mix. I have even put a few in my ice cream and yes, it was still delicious. Plus, what a great and different way to preserve apples instead of just canning everything?
If you are using a dehydrator, be sure to consult your manufacturer’s booklet for times and temps. For dehydrating using an oven, you will want to have the heat set at the lowest possible setting and leave the door cracked open. Times will vary but you will know they are done when the slices will crack but not break when folded. BONUS: You can make up bags of dehydrated fruits or granola (or both!) and then vacuum seal them so they will be just as tasty to eat for about a year!
Apple Pie Filling. Might want to get a towel to wipe the drool as you read this one. Making apple pie filling is just as easy as any of the other things listed here. There are numerous recipes out there so for this one, I will leave the research to you. Chances are pretty good that someone in your family already has a recipe for it. To break it down, you peel and core the apples, cutting the rest into chunks. Add spices and cook until just a little soft (but not mushy!). Consider making a bunch of pie filling up and water bath can some extras for future pie making, too!
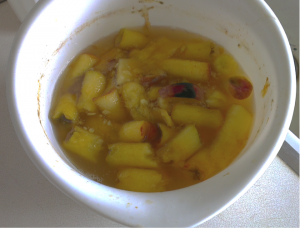
Canned Apples. You can jar up apple slices or chunks in a light syrup (to your taste). Just like you would for peaches except that you don’t need a pressure canner, a water bath canner is perfect! To jar apples, first decide on the syrup you will make. I prefer a light syrup and will use 1 and a 1/2 cups of sugar to a quart of water. I know that seems like a lot but when you consider a heavy syrup is 4 cups of sugar to one quart, it isn’t that bad. You can also use honey if you prefer not to use refined sugar.
Place the apple slices/chunks into the syrup and bring it up to a boil. Fill your jars with the hot mixture, place a lid and band on them and water bath can for about 10 minutes. That really is all to it!
Fruit Leather. Making fruit leather requires some patience but it is worth it! You have to peel, core, and slice up the apples and then cook them down. You want them to be cooked through and mushy. Using either a masher or food processor, your goal is to get the mixture smooth. When done, set your oven to 170 degrees (F) or as low as it will go. While that is heating up, spread out your mixture on a cookie sheet and preferably on top of a non stick mat (like these ones used for making fruit leather). Of course, if you have a dehydrator the process is easier and you already have the sheets needed. Either way, this is a tasty treat that is sure to please people of all ages.
The Leftovers (Cores and peels)

If you thought we were done, surprise! All those apples still have more to give. There are a few things still left to be done with all the cores and peels from making one or more of the delicious ideas listed above. It doesn’t matter if your cores and peels have discolored, what we will be using them for will not be affected by the coloring whatsoever. For us, it is all about making the food stretch out and cutting the waste down!
Apple Jelly. I honestly don’t see too many people making apple jelly and the few times I have had it, I loved it! The truth of the matter is, making apple jelly is one of the easiest jellies to make out there. Think about it, the seeds are huge, the peels won’t go through the filter and if you are using the cores and peels, you aren’t going to have much ‘meat’ to filter out. Of course, you still have to filter it but not 5 times like you would using whole apples. Using this method makes it easier to get a nice, clear jelly.
Apple Cider Vinegar. This is one I have personally done. The first year I made applesauce, it seemed an awful shame to just toss all of the leftovers and went online to see what I could do with them. I hadn’t learned about the jelly yet but I came across making apple cider vinegar. I’ve used it in a few recipes and my mother in law drinks a little of it everyday for health reasons. The process is very easy and you can find out how I made mine by clicking here.
Apple Juice. I offer this suggestion with caution. You will not get much out of it and you need to make sure the seeds are all filtered out. Do some research on it before attempting! Best to (in my opinion) make jelly or vinegar with it.
Other Suggestions
- Apple crisp
- Pastries, apple fritters, ‘fruit burritos’
- Cookies
- Apple dumplings
- Candied apples


I make apple sauce with a victorio strainer. I wash, quarter and cook the apples then send it through the strainer 2-3 times. Can I use the glob that’s left to make apple cider vinegar?
I don’t believe so. Because it was cooked, and/or used spices or sugar, the apples are different. The stuff the bacteria would eat during fermentation isn’t there. I’ve only ever seen recipes calling for fresh, not cooked. A Google search may bring something up though! I’m no expert.😊
Thank you for the question and sharing how you make your applesauce!
It’s also the season of abundant tomatoes – we make the most delicious salsa that has tomatoes and apples as part of the ingredient list – freeze it or process it, and share it with family and friends all winter; we also peel and cut our apples and freeze them – they’re great for applesauce or pies, or crumble, etc.
You’re making me hungry! That sounds delicious. Thank you for sharing what you do with your goodies!
Mix up sliced apples with cinnamon and sugar just as you would for a pie. Put wax paper or parchment paper in the bottom of a pie pan. Fill it up with the mix and freeze. When frozen, pop it out and put in a plastic bag. When time comes to make an apple pie, put the bottom crust in, add the frozen apples, then the top crust and bake. Easy as pie.
I love this!! Thank you for sharing!