You’ve just come in from the garden and your baskets runneth over with home grown goodness. You may have giggled with delight as you put all the food on the counter or table, snap a few pictures and share with your friends and then…it hits you that the work has only just started. You have some food that needs to be pressure canned while others are water bath canned. Add to it smoked fish and the workload gets even heavier.
3 years ago, I was a total canning newbie. Over time, I became a confident canner. Now it is time to really step up my game and become an efficient canner. The workload I was faced with (and only two days to get it all done) was daunting, especially considering it had been about 7 months since I had really canned anything – water bath or pressure canned – and now I was faced with having to do both methods to get everything done.
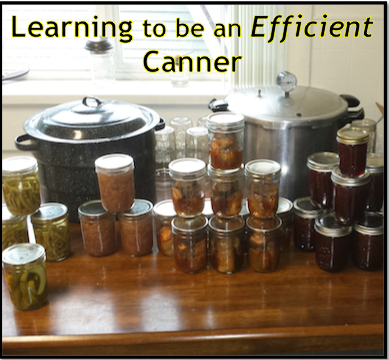
My workload included:
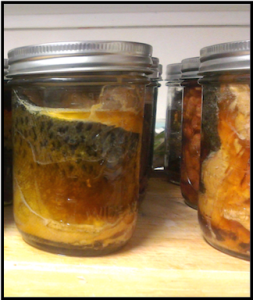
- Smoking and jarring fish ( first smoking it and then pressure can)
- Making my favorite Cinnamon Salmonberry jam (first make it and then water bath can)
- Green beans from the garden (pressure can)
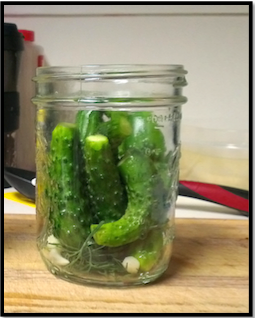
- Make pickles (water bath can)
Doesn’t seem like much, does it? At first glance, some people might think that I am being wimpy but those who have been canning awhile know that there is a lot of time that goes into each batch being processed. So, how to be efficient with your time, energy, and utilities? I don’t claim to be an expert and this is what worked for me. It is my hope that these little tips and tricks will help others ‘up their game’ and get more while doing the same steps in an efficient manner.
Certain assumptions are made such as you have a separate water bath canner and pressure canner. It is also assumed that you know how to do both methods of food preservation and are comfortable with them.
So I was faced with having to smoke the fish, then pressure can it. I also had to make the jam and then water bath can it. The green beans require pressure canning while the pickles are water bath. The two items that need pressure canned require vastly different processing times (90 mins for fish and 20 mins for beans) and it just isn’t possible to hit the pause button and take the green beans out at the 20 minute mark so that means two pressure canning runs will be needed. I always like to have a full canner, especially when doing up meats due to their long processing time but had no idea how many jars I would actually fill up. It was going to be a juggling act but I was determined to get all of this done over the weekend (along with normal laundry, house cleaning, etc).
My grandmother’s advice came to mind while looking at it all: “Whatever takes the longest, start first.” Right on Grandma, I’m on it! The smoked fish will take the longest. It needs a 4 hour brine, and then smoked for 4-6 hours, and then in the canner for 75 minutes (normal time is 90 minutes but they are partially cooked by the smoker and I learned last year that going the full 90 mins will ruin the batch).
 Into the brine the fish go. I grab all the jars and lids I think I will need and get them ready to be used. While those are getting cleaned, I pulled out the bags of salmonberries to start making the jam. As I was squishing them up to be measured, it occurred to me that I have not bought any jams or jellies from the grocery store (or anywhere else for that matter) in almost 4 years! Let me tell you, that was a happy realization and extra fuel for the fire.
Because the water bath canning is a much quicker process than pressure canning, I decided to run two batches of the jam and use up all the berries we had while waiting for the fish to brine up. In the second batch, I snuck in the single jar of pickles and cannot wait to pop it back open and eat them up! We allow a minimum of 2 weeks before opening so the vinegar can work its magic.
So after about 3 hours of making jam, I am finally ladling the molten jam into jars to be water bathed. Most recipes call for 10 minutes but I usually do a 15 minute water bath, just to be sure. Whew! While those are boiling, I take a seat and start working on the green beans harvested from the garden. Sitting feels fantastic but I am still being productive for the next round but I face a quandary: there are no where near enough jars to fill the canner even one layer, let alone double! I really dislike running the canner when not full but it was either that or lose out on the first green beans harvested. Not really an option.
When it comes to pressure canning veggies, the time spent at pressure is usually very low: in this case 20 minutes at 11 pounds of pressure. In some cases like this one, it takes more time for the canner to be properly vented, brought to pressure, and cooled down naturally than it does to process the beans themselves. If I had realized how few beans I really had, I would have soaked some beans the night before so I could fill the canner up. Alas, lesson learned. Learning to be an efficient canner is a work in progress and I daresay I will never be done working on it!
Green beans are cut and put into jars with the smoked fish just about ready to go into the smoker itself. It is at this point I realized that I would not be able to do it all in one day. The smoking part of the fish will take at least 4 hours, more like 6! Mister Dreamer helps by taking all the fish and getting it into the smoker so I can finish up with the green beans. Once they are completed, we have to wait until the next day to finish the project up.
 Bright and early, I got the jars and lids ready with some pinto beans on the side just in case. Since the meat will be processing for such a long time, I always get enough jars and lids out to fill the canner. Whatever jars are left over after the fish as been packed will have just under a half cup of dry pinto beans, salt and pepper (sometimes I will put in garlic and/or onion, too!) with boiling water over the top.
I ended up with 3 jars of beans this time around. I have gotten so used to having jars of cooked beans around that I plan on doing a pressure canning batch of just beans this year to ensure we have enough on hand. I use them to make refried beans, filler for stews, and to whip up a fast version of chili. ***SPECIAL TIP: If you are processing up pork, beef, chicken, etc. and end up with smaller bits of meat, put it in WITH the beans and some spices to make your own ‘heat and eat’ meals!
Lessons Learned
With this particular canning session, I wanted to get it all done in one day but was unable to because the fish took longer than I had planned on. Had I brined the meat the night before, I would have met my goal but the lessons learned make it all worth it. If I am pressure canning veggies, having some pre-soaked beans on hand is the way to go! You use the same amount of energy for each batch so why not make sure you are getting the most out of it you can?
Grandma was indeed right: Whatever will take the longest should be started first. You can get it going and work on the others as time allows. Having the fish in the brine while water bath canning made me feel like a rockstar of food preservation. Seems silly but ask anyone who preserves their own food and they will tell you that while none of it is ‘hard,’ it is time consuming. Failure is rather heartbreaking, especially when you have to toss a jar of food out because it didn’t seal right or you’re picking glass out of the canner from a jar breaking.
2 years ago, it would have taken me far longer than a day and a half to process the 30+ pints I did up. Like with anything, learning to be an efficient canner is an ongoing process and I hope the article above helps to keep things in perspective! You got this!!


Great information and tips! Thank you for for posting your experiences, it will definitely help me as I enter the club of pressure canning peeps!
You are welcome! Feel free to ask questions anytime. You can reach me here, on Facebook or email me at akhomestead.dreamer@gmail.com.
Wow, I’d thought you’d been canning for quite a bit longer! I too, have been canning, going on the fourth year and have learned similar things. I try to prep as much food as I can in day one so the time is cut down a little the next day. I also prefer frozen rather than canned for a lot of things so that’s a different process…lol. Thanks for your recipes, love them!
Hi Lori!! Glad to meet a fellow “newbie” to canning. I would freeze more but the prepper in me really likes the shelf stability of canned food. If the power went out for a long time, that is less food that will go bad (and less for me to scramble to get canned up on the propane stove!). I am glad you enjoy the recipes and thank you for the comment.
Great information and a great read. Thank you for taking the time.
Thanks for the information. I used to can vegetables but now only can jams, tomatoes, and peaches.I blanch the green beans and put them in freezer bags. I find they freeze so well, and it is so much easier. I have spoken to people selling canned green beans at the Farmers Market, and they prefer the taste of water bathed green beans. The water bath takes 8 hrs.
Water bath is not the safest method for canning green beans. 🙁 http://nchfp.uga.edu/publications/nchfp/factsheets/greenbeans.html
“Q: I want to can my green beans in a boiling water bath…is that ok?
No. Green beans are a low-acid food and require the higher temperature from a pressure canning process for a pre-determined length of time in order to destroy the potentially deadly bacterial spores of Clostridium botulinum. The ONLY processing we can support for green beans is under pressure, using the directions and steps found on our website at http://nchfp.uga.edu/how/can_04/beans_snap_italian.html. The correct procedures include the steps for managing the canning process found here: Using Pressure Canners.”
I too am a reasonably new pressure canner (7 years) but had water bathed for many years. I am still learning every day and love it, I do believe being efficient is important and like to think that I am reasonably efficient.
I do like to prep everything andctry to makevit alk run smoothly, and I am a big fan of always running the canner at full capacity, 19 pints or 14 quarts, and will always throw in a few jars of chick peas if I am doing a load of meat and am a few jars short.
Happy canning
Jane
Thank you for the comment and sharing what you do. I have never canned chickpeas before and of course now I am curious. Happy canning to you too!
Please…process your smoked fish for the full time. It is not worth the risk. It doesn’t matter that the fish is partially cooked in the smoker, just as you can not shorten the time when re-processing. If you think the fish is over done then try cold smoking them so as not to cook them first. Botulism is no laughing matter and should not be taken lightly. It is the reason for the long canning time.
Thank you for the safety comment. As with everything in life, each person is responsible for their own choices. Every time I canned for the full time, it was rendered inedible. I choose to can for less time considering the fish is 75% cooked, then canned for an hour. Worked fine thus far and we can longer than most around here after smoking their fish. Most only can for 30 minutes or so.