I really don’t do much in the way of fermenting, other than pickled food, as a food preservation method. Kombucha, kraut…we don’t really eat any of it so there was never a need to learn how to do these things. Recently though, an opportunity came along that pushed me into making my first batch of kraut. I have tried the stuff from the grocery store several times and found it….less than palatable. I used to be the same way with peas until I grew my own and thought perhaps I will like sauerkraut if I make it myself.
Enter Masontops.com! They contacted me and asked about doing a guest post about making kraut (they noticed I didn’t have anything about fermentation) and I ended up getting quite an education from them. I also got talked into trying out their glass weights and packing tools, which I ended up being very thankful for when mashing up my first batch.I have made my first batch and it is in the cupboard, working the fermenting magic. I was pretty pleased when I went to buy the cabbage – it was on sale $0.68 a pound!
I went very basic on the recipe and only added carrots for color. I have another head of cabbage that I plan on adding some caraway or pepper. I will be reporting on how things turned out on my own adventures in kraut making next week. I will say that I LOVE their pebbles for weighing stuff down.
Look for the coupon code EXCLUSIVELY offered to Homestead Dreamer readers below!
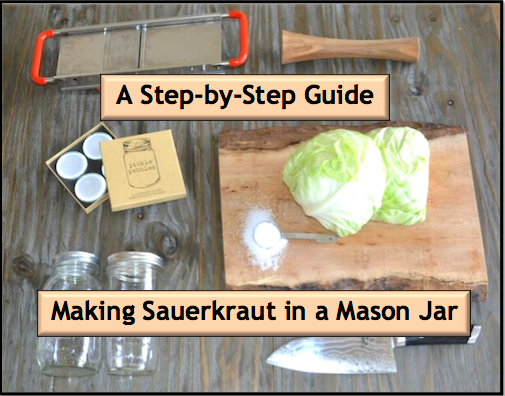
A Step by Step Guide to Making Sauerkraut in a Mason Jar
The sour tang and crunchy texture of sauerkraut is great on its own and raises the bar on any BBQ’d sausage and it’s so easy to make at home.
Sauerkraut is made through the process of lacto-fermentation. This is how olives, pickles, kimchi, and even yoghurt and cured meats are made. When the cabbage is submerged in a brine the sugars in the vegetable convert to lactic acids, which are natural preservatives. This produces something that is not only delicious but also good for you: sauerkraut is full of probiotics, just like yoghurt.
So if you’re ready to experiment with fermentation, sauerkraut is a great place to start. And you don’t have to worry about turning your kitchen into a laboratory. All you need is a mason jar and few other accessories to turn the humble cabbage into a star.
WHAT YOU’LL NEED
- 1 Green cabbage
- 2 tbsp. kosher or sea salt
- Optional: apple, caraway seeds, peppercorns, carrots
- Mason jar
- Masontops Pickle Packer
- Masontops Pickle Pebbles (wide mouth size is available in June!)
- Large bowl
- Knife and/or Mandolin slicer
- Cutting board
- Plate
- Optional: Masontops Chalk Tops
Step 1: Keep It Clean
To give the good bacteria the best chance of thriving, you want to make sure your equipment is incredibly clean. You’ll be using your hands a lot too, so give them a good wash as well! Soap and water or a run through the dishwasher works great for your Pickle Pebbles, mason jar, plates, bowls, and knives. Empty any water from the jar and place jar, lid, and Pickle Pebbles on a clean towel dry.
Step 2: Chop, chop
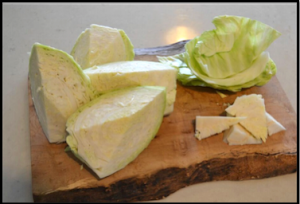 Rip off the outer leaves from your head of cabbage. You won’t need this for your kraut so these can go into the compost. Cut the cabbage into quarters and remove the core from each part, but hold on to one leaf from each quarter. You’re going to want these for step 6. Slice your quarters finely with a knife or a mandolin slicer
OPTIONAL: If you are adding any other fruits or veggies (carrots or apples) to your kraut slice or shred them now too.
Step 3: Layer It On
In a large bowl start layering and salting your cabbage. Put two handfuls of cabbage into your bowl and cover in a sprinkling of salt (roughly 1 tsp.). Repeat until you’ve used up all your cabbage.
Step 4: Mix It Up
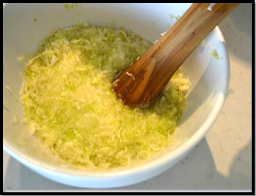 Mix cabbage by hand (clean hands!) with the salt. Use your Pickle Packer to compress the mixture and draw out any moisture from the veggies. Keep going until you see liquid covering your ingredients when packing them down. This may take a few minutes, so no, you’re not doing it wrong if it doesn’t happen right away.
Step 5: Pack It In
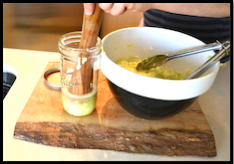 Next you are going to transfer the salted cabbage and brine into your sanitized jar. Place a handful or two at a time into the bottom of the jar and compress it with the Pickle Packer. Make sure to pack it all in tight – the more compressed your cabbage, the better.
And you don’t have to worry about whether your Packer will fit your jar. One side is sized for a regular mason jar and the other is for wide-mouth jars so you’ll be fine no matter what you’re working with.
Don’t stop until your mixture is completely packed inside the jar and the liquid rises above the cabbage. If you’ve come across a dry cabbage (happens from time to time) which doesn’t produce enough liquid – no worries! You can top off your ferment with a simple salt water brine (1 cup water, 1 tsp kosher salt).
Step 6: Weigh It Down
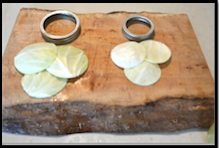
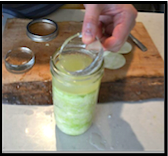 Remember those leaves you put aside? Put them on top of the packed ingredients to keep any floating veggies down below the surface of the liquid. Then place the Pickle Pebble Glass Fermentation Weight(s) on top and loosely place your sterilized lid on. You want to keep the cabbage below the liquid because anything that rises above can be exposed to oxygen, which can cause spoilage when using this fermentation method.
KRAUT PRO TIP: Use the lid of your mason jar as a cookie cutter to cut perfectly sized rounds from your reserved cabbage leaves to cap off your kraut and keep any floaties under control.
Step 7: Fermentation
 Place your jar on top of a plate (to prevent possible spillage from active fermentation) and put it away in a dark cupboard. Your cabbage will need a minimum of three days to ferment, but two weeks will create a nice, strong briny flavour. Try some along the way and stop once you’re happy with the taste.
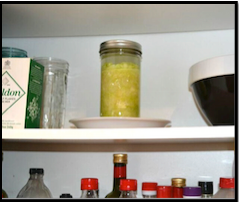 IMPORTANT: Once per day you should burp your ferment to allow the natural gasses to vent. Simply open the lid a touch to let the gasses escape.
KRAUT PRO TIP: If you want to avoid having to burp your ferment you can use a “fido” style jar instead of a mason jar. Other air lock products are available specifically for mason jars. Masontops is currently working on such a vent. Stay tuned!
Step 8: Label, Refrigerate, and Enjoy!
Once your kraut is ready, do what any normal human would do and eat it right out of the jar until you can’t move anymore… well that’s what we usually do anyways. After you’ve eaten all the kraut you can handle, put the jar in the fridge. This will keep your kraut delicious and crunchy for several months. Be sure to continue to use clean utensils when you dig in for more because you want to keep that good bacteria happy and separate from any of the bad.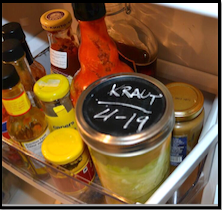
KRAUT PRO TIP: Use a label (our Chalk Tops work great) to remind yourself what’s in the jar and when it was made. Kraut can technically last for months, although if you make it right, it tends to disappear much faster
I followed these instructions for making my first batch and they were very easy to follow. The pictures helped me a lot as well (thank you Masontops!) since I had never done anything like it before. I am really excited to add these skills to my list and am hopeful it turns out good! My batch is fermenting about 2 weeks and will be served at a BBQ celebration in the middle of the month.
While it is true you don’t need the tools used here to make kraut, they sure make things easier and I am all about that. Whatever saves me time, money, increase my changes for success, and make a superior product? I am all over it!
Feel free to share the savings with any friends and family! Want to learn more about Masontops? Follow them on Facebook, Twitter, and their main website!


I make my sauerkraut like my grandmother did hers and it is much more simple then your method. It really is very easy. Just shred your cabbage, pack it into whatever canning jars you want to use, pour hot water over the packed cabbage ( up to about 1/4″ of the top of the jar, add 1 tablespoon of salt, rotate the jar a few times to mix water and salt, seal the jars and place in a dark place to ferment. That’s it. Mine always turns out great just like my grandmother’s did. My Mom also used this method. As kids, we use to sneak into grandmaw’s closet where she had the sauerkraut and open a jar and eat it without her knowing until she noticed some jars missing or an empty jar on the shelf.
Is it crisp?
Yes! There was a good crunch on it still. It was very tasty!
how long do you leave it and you know it is ready
It depends on how much is in the jar/crock and temperatures. Generally speaking, when the bubbling is less and the liquid starts to go down some instead of bubbling up. The rule of thumb seems to be a couple weeks. Thanks for the question!
What does “seal the jars” mean please?
This is the way my mother always did hers and I canned 24 quarts last year. Turned our great. No add the salt then pour the boiling water over the salt to distribute.
I add a little brown sugar to the kraut when serving the children.
Does this have to be refrigerated? Can I water bath can to keep after fermentation?
Hello! Once opened, yes it will need refrigerated. Water bath canning is an acceptable method for processing your jars. Some people prefer to pressure can everything and may say that you are running a risk of getting sick by water bath canning. That is a choice you have to make for yourself.
We water bath. 🙂
we water bath our kraut after a 2 week fermentation in a dark cool corner in the cellar, 25 minutes for quart jars. have never had a problem and have delicious kraut.
I made kraut the old fashioned way in a crock jar, with a plate on top and a quart of water for a weight on top of the plate and covered the crock with a tea towel. It worked very well, but, of course, the fermentation gases were let out into my kitchen and my family was about to leave home or force me out. Love this idea of the mason jars. May try it again. I remember my father-in-law was so proud, you would have thought that he made it himself.
Did the mason jar kraut way for years successfully, but I preferred using wide-mouth jars. The jar method is the way to go. Sometimes I would add an entire stalk of dill to the jar and layer it the middle; always a treat and the first to be used up.
I’ve also moved completely over to the wide mouth jars, for everything! It’s just so much easier, I don’t know why anyone would use regular mouth except maybe for half pints of jam in the decorative jars. Thanks for the comment and tip about the dill!
We love making kraut and kimchee. Thank you for posting the tip about using the lid as a template. I would have never thought of that and it is so simple!
This post (and many of yours) would be perfect for the Waste Less Wednesday Blog Hop. It is a collection of environmentally friendly posts (homesteading, sustainability, zero waste, recycling, etc). This week’s is live now: http://www.skipthebag.com/2016/10/waste-less-wednesday-blog-hop-101216.html
Thanks! I will check it out!
Perhaps I’m dense or just reading too much into the instructions and tend to over analyze everything but if you would please clarify one point for me I’d be grateful.
When you mention sealing the jars when packed to allow the fermentation process to commence, do you mean “seal” as in placing a lid on top them add a ring and cinch it down as in preventing any gasses to escape or just loosely place the seal and ring in place so gasses can escape somewhat easily and NOT build up pressure while insuring the cabbage remains covered with liquid?
I’ve read elsewhere that you want to keep the cabbage submerged beneath the liquid surface so the cabbage isn’t exposed to the air, but those instructions said to just keep it weighted down and covered to prevent bugs or dust from floating down on top and contaminating the product.
TIA for your help
The answer to the first question would be “finger tight” not sealed.
The answer to the second question is that the cabbage is submerged by the weights (weighted down by the pickling pebbles) that go inside the jar.
Hope this helps!